Hey there folks, Freda from CannCreateDesigns here again to share another 3D project using MTC software and the Cricut Expression. As soon as I saw the Cotton Tail Village set from SVGcuts I knew I had to make the egg box for you.

The base of the egg was cut from white cardstock from my stash, the panels were cut from a DCWV paper pack called "The Linen Closet" that I had purchased at Joann's the day before the cut files were released. They worked out perfectly for this project. After watching the assembly video on the SVGcuts website I cut everything out and laid it out to make sure that I have everything to get started.

I just realized that I didn't take any pictures of the box bottom and lid assembly for some reason but the assembly of the box bottom and lid are pretty clear on the website video if you need assistance...Next I chalked all the edges that need embellishing with coordinating colors of VersaMagic Dew Drops. I love these chalks and have worn out more than a few of the Jumbo Java color which seems to go with everything vintage looking.

After chalking the panels I begin assembling the egg base. These panels cut with score marks for easy folding and are numbered so you don't have to guess which one is next.

For this particular project I found it easier to glue all of the points at the top and allow them to dry first, then glue the bottom part. I used Clothes pins to help hold the pieces in place while gluing the next piece down, without the clothes pin they popped loose as soon as I moved to the next panel. This just seemed easier to me because of the small opening at the bottom and the stiffness of the cardstock I was using.


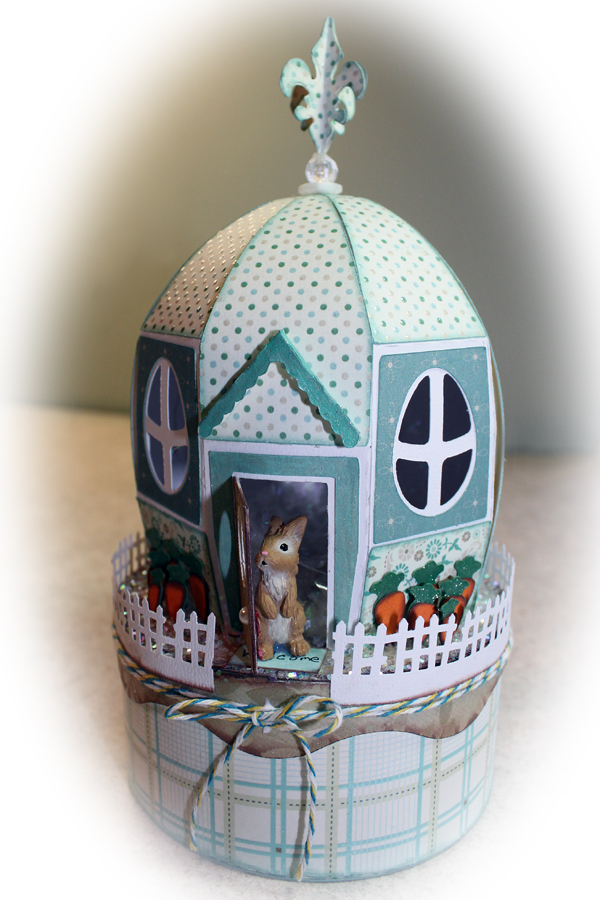
Once completed I thought it could use a little bling (of course). So I added Doodlebug Design Sugar Coating Glitter around the top of the box. Made a little welcome mat, and added a Martha Stewart Border Punched Fence (think it was the Halloween one). I found this little bunny at the TSC Farm store that was the perfect size, cut some carrots for a garden from the Create a Critter cartridge (cut at 6@ .75", 4@ .60", 2@ .5").

Inking those little carrots can be a pain...but I've figured out a way to do it a little easier with my tweezers...just pick it up and tap it onto the ink/chalk pad. When the carrots are glued together put a blob of glue on the end and hold it in place on the box until it stands on it's own.

There was still something missing...a quick glance around my scraproom and I saw some twine that I tied around the lid and the Tim Holtz Mini Fleur die I had bought on clearance the day before. I cut 4 fleurs, scored and glued them together. Attached a button and a bead to the top of the egg. After the glue in the bead/button piece dried I put glue on the end of the fleur and gently pushed the end into the hole in the bead. Wallah!!! Finished....
I hope you like this project as much as I liked doing it...
Thanks for stopping by,
Freda